

Recently I found myself wanting to create an image in Photoshop that was as much about the heavy vignette surrounding it as it was about the image itself. I wanted to be able to work with a completely editable vignette rather than having to keep starting that layer from scratch every time I needed to tweak it, and realised I didn’t actually know how! So this is a guide to creating an adjustable vignette in Photoshop just in case anyone else out there needs to do the same thing – or in case I forget how I did it in the future! ;)
By the way, I’m using Photoshop CS4. Also, there may well be other ways to do this but this is the one that worked for me and it’s dead easy.
The Job
I’d been commissioned to produce a panorama of the iTunes Festival stage at The Roundhouse in London, to be used as the backdrop for filmed interviews in a backstage area. I went along to the venue just as the stage and lighting riggers were putting the finishing touches to the set a few days before the first gig and we shot a series of panorama shots from the balcony overlooking the stage.
The first thing I have to say is: WOW – The Roundhouse is a magnificent venue no matter what, but all lit up in the iTunes pinks and blues it looked absolutely phenomenal.
Once the images were shot the designers and I threw together a rough panorama, marked out where the crop should be and sent it off to another company who were going to rebuild it from the RAW files and prepare it for CMYK printing. CMYK conversion from an RGB image tends to be perceived as ‘dull’ on computer monitors and I wanted my own version so I took the RAWs home and had a go at recreating it for my own enjoyment.
The Adjustable Vignette
Creating the panorama itself was no problem at all for the Photomerge tool. It’s hidden away under Image -> Automate -> Photomerge, and this is what it came up with from the six images I selected:
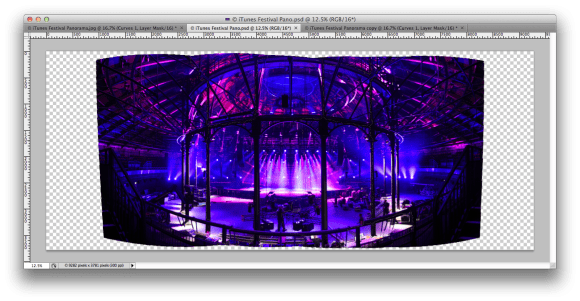
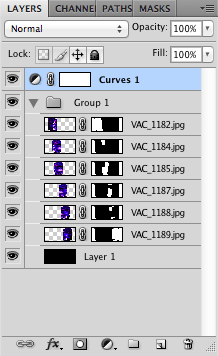
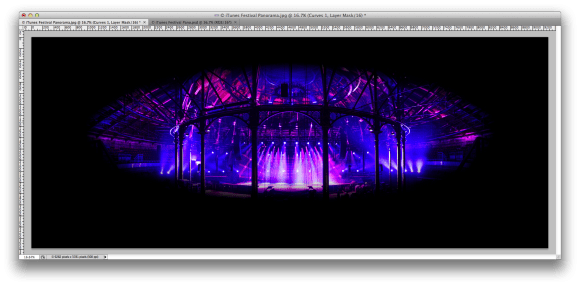
I added a black layer to the background to hide the ‘shoot off’ (you probably don’t need this), and then a Curves layer on top (you do need this!):
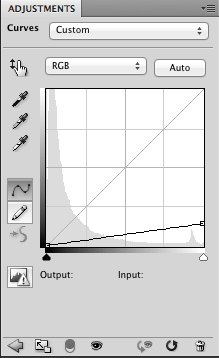
Because my vignette is going to be severe I grabbed the right hand end of the Curve, the ‘highlights’ area, and pulled it almost all the way down to the bottom (this darkens the entire image but we’ll fix that in the next step):
With the Curve layer mask icon selected I used the elliptical marquee tool to drag an ellipse roughly across where I wanted the scene to be visible. You can see the rest of the image slightly showing through because I didn’t fully pull back the highlights on the curve layer. Then I hit Command-Shift-I to invert the selection and there’s my shot coming through:

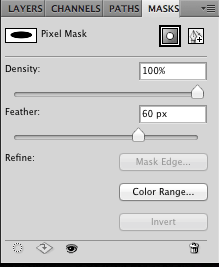
Next up I feathered that hard edge by making sure the Curve layer mask was still selected in the Layers panel, then opening the Masks panel (either from the Window menu, or selecting it on your pallet), and dragged the Feather value up to about 60 – but whatever works for you:
Here’s what we’ve got so far:
I feel we’re losing the awesomeness of the Roundhouse ceiling space. I want to adjust that vignette, drag it taller to reveal more of the ceiling and while I’m there widen it to get the curve of the walls in too. Instead of just deleting the Curve layer and redoing it, I once again make sure the Curve layer mask is selected and this time hit Command-T, or Edit -> Free Transform.
Then I grab one of the handles on the rectangular selection box that appears and drag them where I want them:
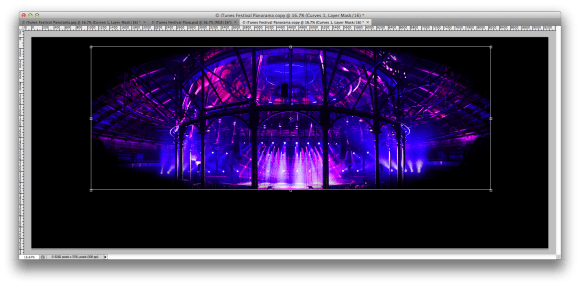
You can use this to change the shape and even the orientation of the marquee – just move the mouse slightly outside the box and you’ll see the ‘rotate’ tooltip appear meaning you can click and drag to spin the selection around to where you want it.
To save my adjustments I hit Enter, and to finish off the image I cropped away a lot of the black space around the edge:
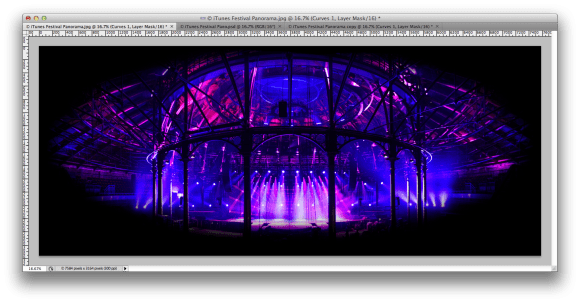
And that’s it, all done. Hope this helps – thanks for reading!

