A few years back I cobbled together a few different Photoshop actions I found around the web to create a comic book effect that’s full of eye popping, realistic-looking colouring, inky black outlines and a great hand-shading effect that really sells the finished image. I’ve used it to make loads of comic-book photo projects for family and friends. I’ll let you know how to download it for free, and then keep reading for a breakdown of how it all works.
A bit of background
I love getting lost in a personal photography project, particularly when the end goal is a gift for family or friends. A few years ago I bought a fantastic app for building comic book layouts called Comic Life Magiq (now Comic Life 3, $29.99 for Mac & PC from from their site, or on the Mac App Store) and I decided to use some vacation photos to make a comic about my then-wife’s two year old nephew as a Christmas present for them both.
(We’ve since split up, this is quite an old post!)
Being a bit of a perfectionist I’m afraid that much as I love Comic Life I thought its comic book photo filter was a bit weak. I figured I could do better in Photoshop so, grand visions in my mind, off I went on a hunt for comic book effects online. But while there was no shortage of tutorials, plugins and apps offering variations on the comic-style look, the end results all tended to look a bit too much like a photograph and not enough like a comic book illustration.
Eventually the trail led me to a site called MacMerc, full of creative resources for Mac users. Sadly it’s gone now but at the time they had a great (and long!) Photoshop tutorial that I was excited to find almost nailed the look I was after, particularly the smudgy colours and inky details. But it was lacking a little something, it was still a bit too clean.
After a renewed search for ‘photos to sketches’ effects I found what I wanted in a tutorial on giving shadows a hand-inked look, kind of cross-hatch effect. After some tinkering and fine-tuning I bolted the two together in a new recipe that layered up toning, colouring, shading and inking into a look that’s as close as I’ve ever seen to a hand-drawn-and-coloured comic book panel.
Before & After and example shots
Time to check out the effect and decide for yourself – here’s some before and after shots using the ‘stock’ settings I’ve recorded into the action, as well as some sample pages from comic book projects I’ve made with it – and a very cool collage that looks amazing as a wall hanging:
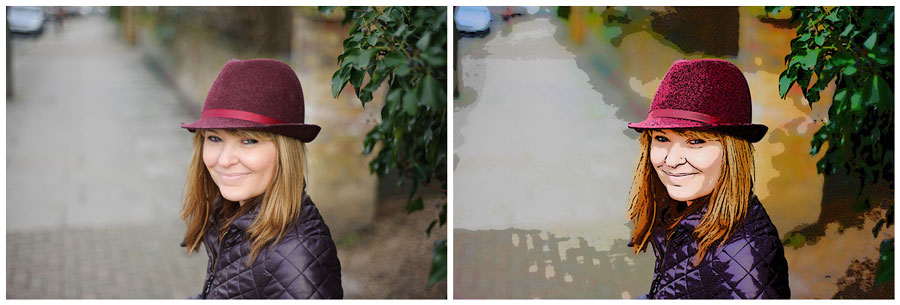
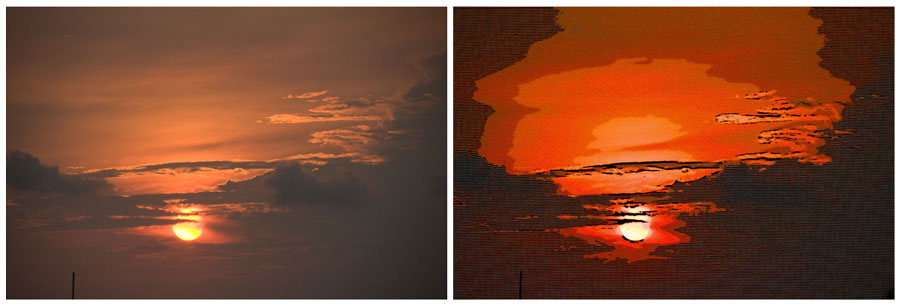
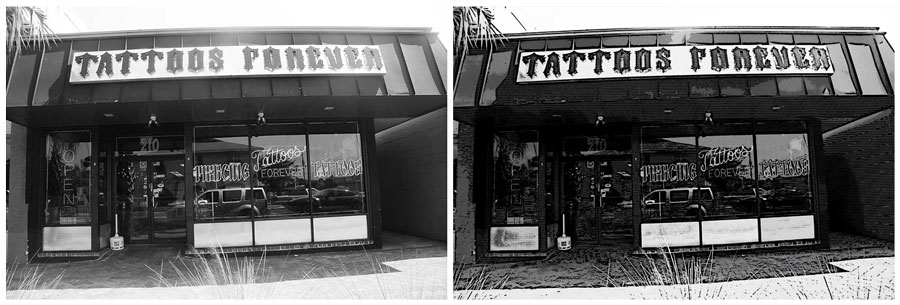
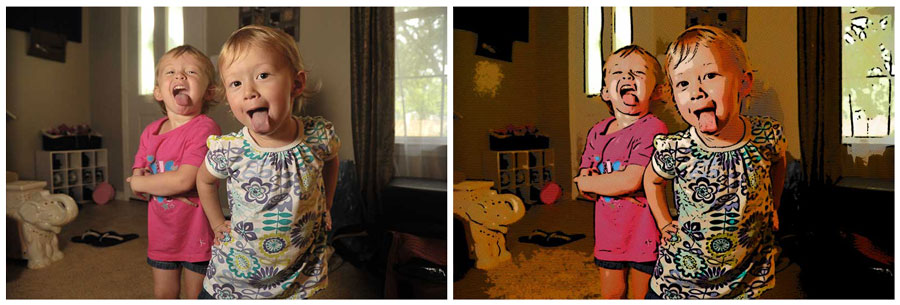
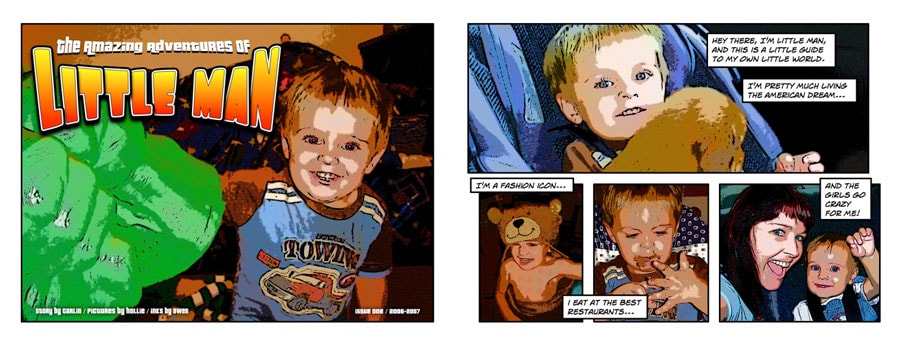
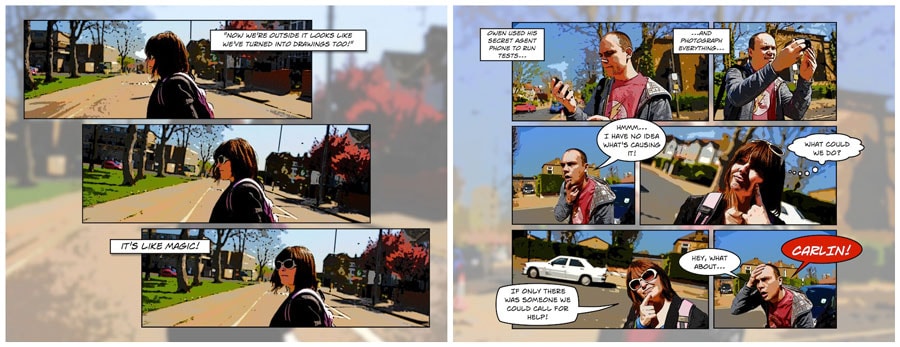

So I think you get the general idea! Ready to download the action and get started using it yourself in Photoshop? Let’s get cracking!
Download and install
You can download the action from my site totally free – just use one of the buttons below to spread the word about the free goodies, and I’ll give you access to the download link.
[sociallocker id=”9205″]
Downloading
Thank you! Just click this link and your download will start!
[/sociallocker]
Installation
Expand the zip file and you should have a folder containing a Read Me and a file called ‘Comic Book Effect.atn’. Double click on the .atn file and your copy of Photoshop should open and add the action to your collection inside a set called Comic Book Effect.
The set contains two actions: the Large version is ideal for most photos: mine tend to be between 2000 and 4000 pixels on the longest side. For anything much smaller, say 800-1000 pixels, use the Small version.
Requirements
I made this in Photoshop CS4 so it should work on all newer versions and probably most older versions, but probably not Photoshop Elements. Some of the steps may take a while on older/slower computers, especially if you have any other large images open at the same time.
Images you run the effect on must be named ‘Background’ in the layers stack, just like it is when you open images in Photoshop. If you’ve already done some work on the image and have called it something else, rename it Background.
If you already have some adjustment layers applied make sure you select the Background layer before you run the action or it will get messy!
And finally, remember that the key to really good results with this effect is to use images with good contrast.
How to use the action
Open an image, select the action and press play, and everything will take care of itself apart from a couple of steps that require you to specify a location to save and load a file called ‘Displace.psd’ which is required for the cool shading effect. Because I don’t know where you’re going to save this file I couldn’t record it in advance, so if you want to automate this step (which you should!) here’s how to record the location yourself. Don’t worry, it’s easy.
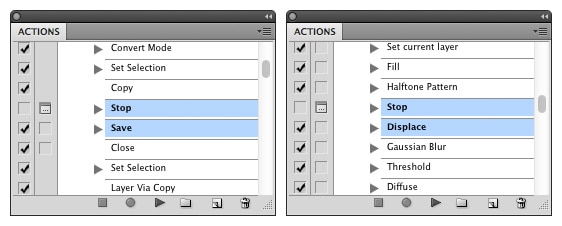
Automate the ‘Save Displace.psd’ step
- Open the action and near the beginning look for a Stop action immediately followed by a Save action.
- Disable the Stop by unchecking the lefthand box next to it, the one with a check/tick in it.
- With any image open, double-click on the Save action and save the image as Displace.psd in the location you plan to always save this file. I keep mine in Users -> Pictures -> Comic Effect -> Displace.psd. The file is overwritten every time the action runs so it doesn’t matter what image you use to record the location.
- Now toggle off the righthand box next to the Save command, to prevent the Save… Dialog coming up when the action reaches this step.
Automate the ‘Load Displace.psd’ step
- Look near the end for a Stop action immediately followed by a Displace action.
- Disable the Stop as before, by unchecking the lefthand box next to it.
- Double-click on the Displace action. Leave the settings in the first dialog where they are (25, 25, Stretch To Fit, Wrap Around), then in the next screen navigate to wherever you saved ‘Displace.psd’ above and select that file to load.
- Now toggle off the Displace action dialog box as before.
All done – you’re fully automated and ready to churn out comic book panels!
How it works
Here comes the science bit! Well, sort of. The action creates six layers to build the comic book look on top of the original photograph, so let’s take a look at each of the layers created for this photo of a friend’s daughter keeping me at bay with a bubble gun:
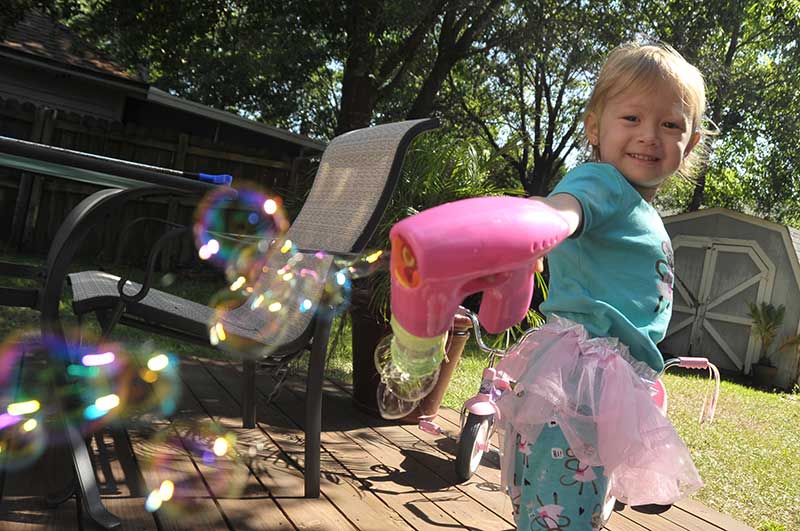
The original image: this will remain just visible through the six filter layers. Try turning it off, sometimes this can improve the finished effect.
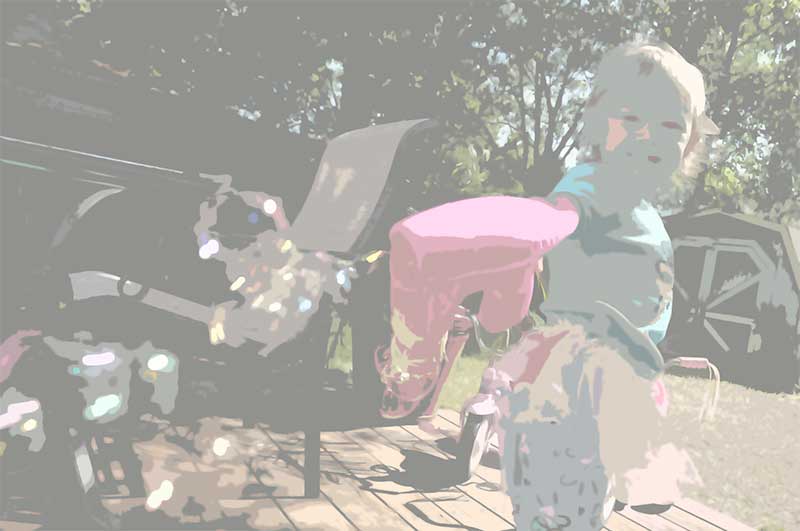
Tone: this uses posterisation and cutout effects to smush out detail and make it look less photographic. Lower the opacity to bring detail back.
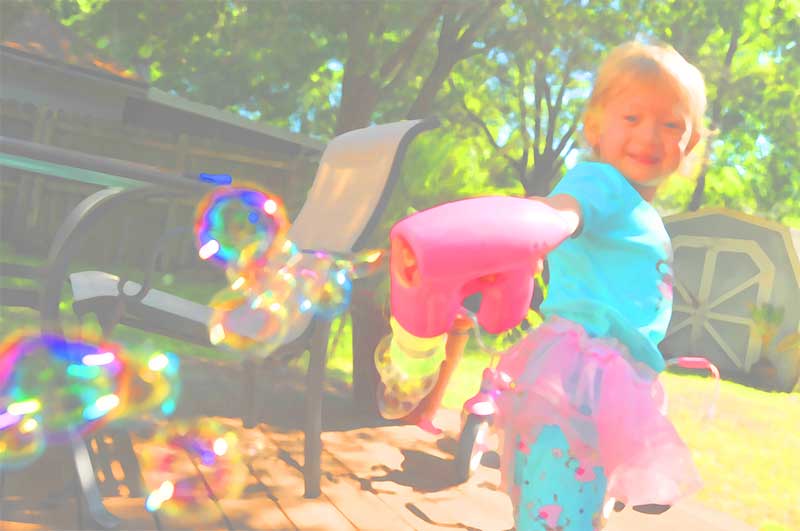
Colour: this boosts saturation to comic-book levels, and bleeds out the edges a little to give that slightly offset, hand-coloured look.

Dots: a colour halftone pattern that mimics CMYK offset printing. I turn the opacity way down to give just a hint as I find it can be too overbearing otherwise, and I’ve used ‘traditional’ colour offset values for the Channel inputs in the Color Halftone settings, but feel free to try whatever you like.
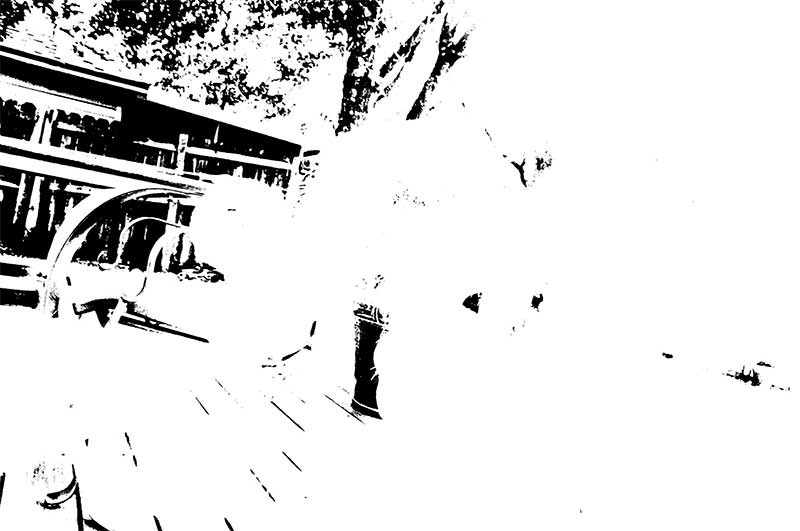
Ink 1: – this creates the deepest shadows, essentially patches of solid black.
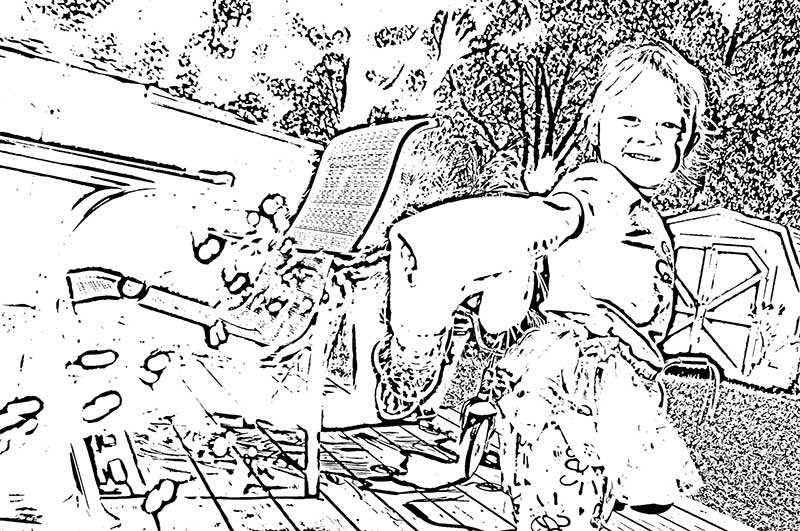
Ink 2: the hand-inked details, created with crafty use of Photocopy, Threshold and a smoothing filter.
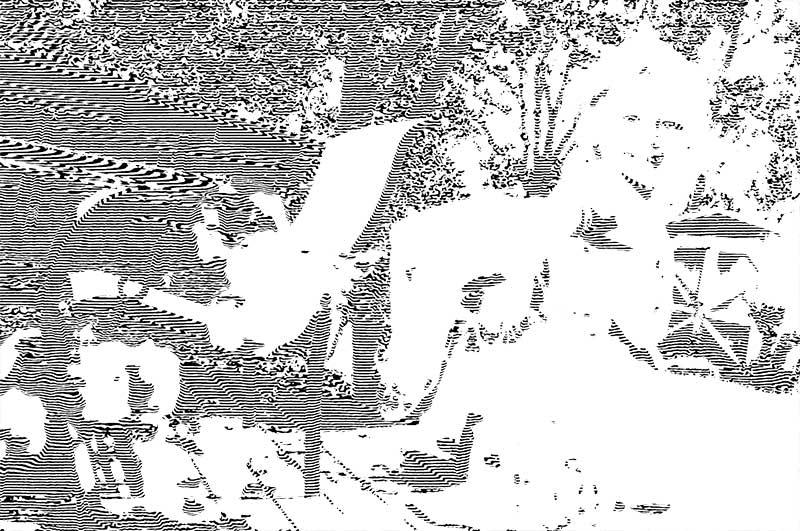
Ink 3: the pièce de résistance: a displacement map is used to layer horizontal strokes over darker areas to create a hand-shaded look.
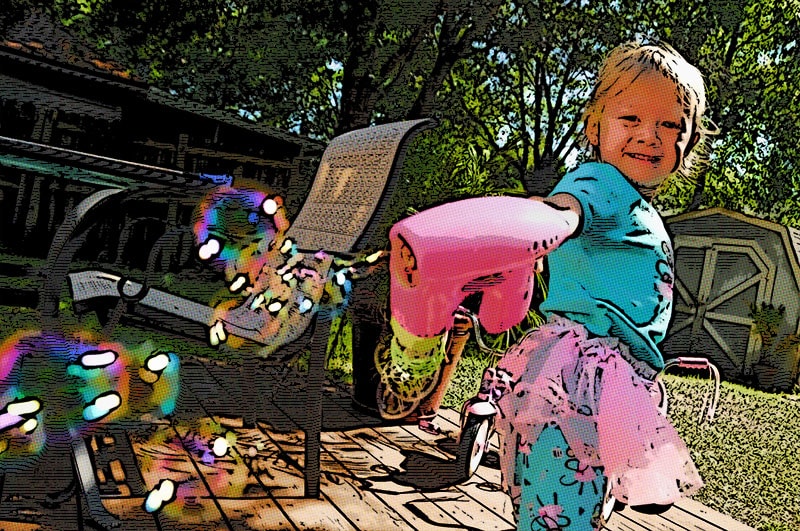
The finished look: all the layers blended as per the finished action. It all comes together gloriously!
Every image is different and sometimes the balance can be a bit off so feel free to play around with the opacity sliders of each layer to get the look what you want. For example if I find the darker areas are overwhelmed, I might pull back a little on the Tone, Ink 1 and Ink 3 layers.
Settings for smaller images
In case you’re interested, the changes I made for running the action on smaller images are as follows:
- the first Smart Blur: Radius 2, Threshold 50;
- Dust & Scratches: Radius 4;
- Photocopy: Detail 4, Darkness 15;
- Halftone Pattern: Size 1, Contrast 25;
- Colour Halftone: Radius 4
Comic book layout apps
Once you’ve got all your photos converted into comics, what next? This is usually when I fire up Comic Life 2 and start building my comic with text, speech bubbles, ‘sound effects’ and other fancy comic-y stuff. Here’s some links to my recommended apps:
- Comic Life 2, Mac App Store, $29.99 / PC, $29.99
- Comic Life 2 for iOS, $4.99
- Halftone 2 for iOS, $1.99
- ComicBook! for iOS, $1.99
And that’s it – download the action for free and give it a whirl. I’d love to see your creations so feel free to link to galleries of your comic book panels in the comments below.
Oh, here’s the download locker again, to save you scrolling back up! ;)
[sociallocker id=”9205″]
Downloading
Thank you! Just click this link and your download will start!
[/sociallocker]
Thanks for reading!
10 Comments
Add comment Cancel reply
This site uses Akismet to reduce spam. Learn how your comment data is processed.


MIL GRACIAS!!! está genial y muy muy bien explicado, gracias por tu trabajo.
Thanks so much for this. I just love the effect.
This is wonderful, exactly what I was looking for. I love the comic strip effect that’s used in the iZombie TV series, wanted to try something like it with my own photos but was frustrated by the apparent lack of a tutorial or app that could nail it. This action does it admirably. See here my first attempt: https://www.lwsphotos.com/Designers/Designers-Latest/i-jdRTCvH/A. Many thanks! :)
P.S. That’s Uma Macfarlane in the photo, originally from Manchester, UK.
Job well done!
Cheers! :)
Buen trabajo. Muchísimas gracias.
De nada! :)
Cheers mate….this is exactly what Ive been looking for….ive wanted to create a storybook family product for my business,now its the comic book style…..and it looks great…..!x
Happy to hear that! Would love to see some shots of your finished products.